Beginning Watercolor Canvas Hydration Wash Panels: A Complete Guide
Facts:
- Watercolor pigments are primarily bound with gum arabic.
- A rising trend in wet on wet color wash art classes for all age groups.
Mastering the Foundation: The Art of Canvas Hydration Washes
Embarking on the journey of watercolor painting on canvas panels opens up a world of vibrant possibilities, but success hinges on a crucial preparatory step: the hydration wash. Unlike traditional paper, canvas has a different surface texture and absorbency that requires specific handling. Proper preparation is the cornerstone of achieving those luminous, flowing colors that define the medium. This guide offers comprehensive watercolor canvas hydration washes training, designed to equip beginners with the foundational skills needed to control pigment and water effectively. By mastering this initial stage, you create an ideal surface for seamless blending and layering, preventing patchy results and unlocking the full potential of your paints. We will delve into techniques that make the process accessible and rewarding for everyone.
Understanding Canvas Absorption vs. Traditional Paper
A critical step for any aspiring watercolorist is to consult an informative guide to fine art paper absorption to understand the fundamental differences with canvas. Traditional watercolor paper is designed to absorb water and pigment into its fibers, allowing for deep, rich saturation. In contrast, gessoed watercolor canvas has a less porous surface. The gesso primer creates a barrier that causes the paint to sit more on top of the surface rather than sinking in. This characteristic is what necessitates a hydration wash. By pre-wetting the canvas, you create a temporary film of moisture that allows pigments to glide, mix, and settle evenly, mimicking the behavior of paint on high-quality paper. Without this step, applying a wash directly to a dry canvas often results in streaky, uneven color and hard edges that are difficult to correct, frustrating many newcomers.
A Step-by-Step Guide to the Perfect Hydration Wash
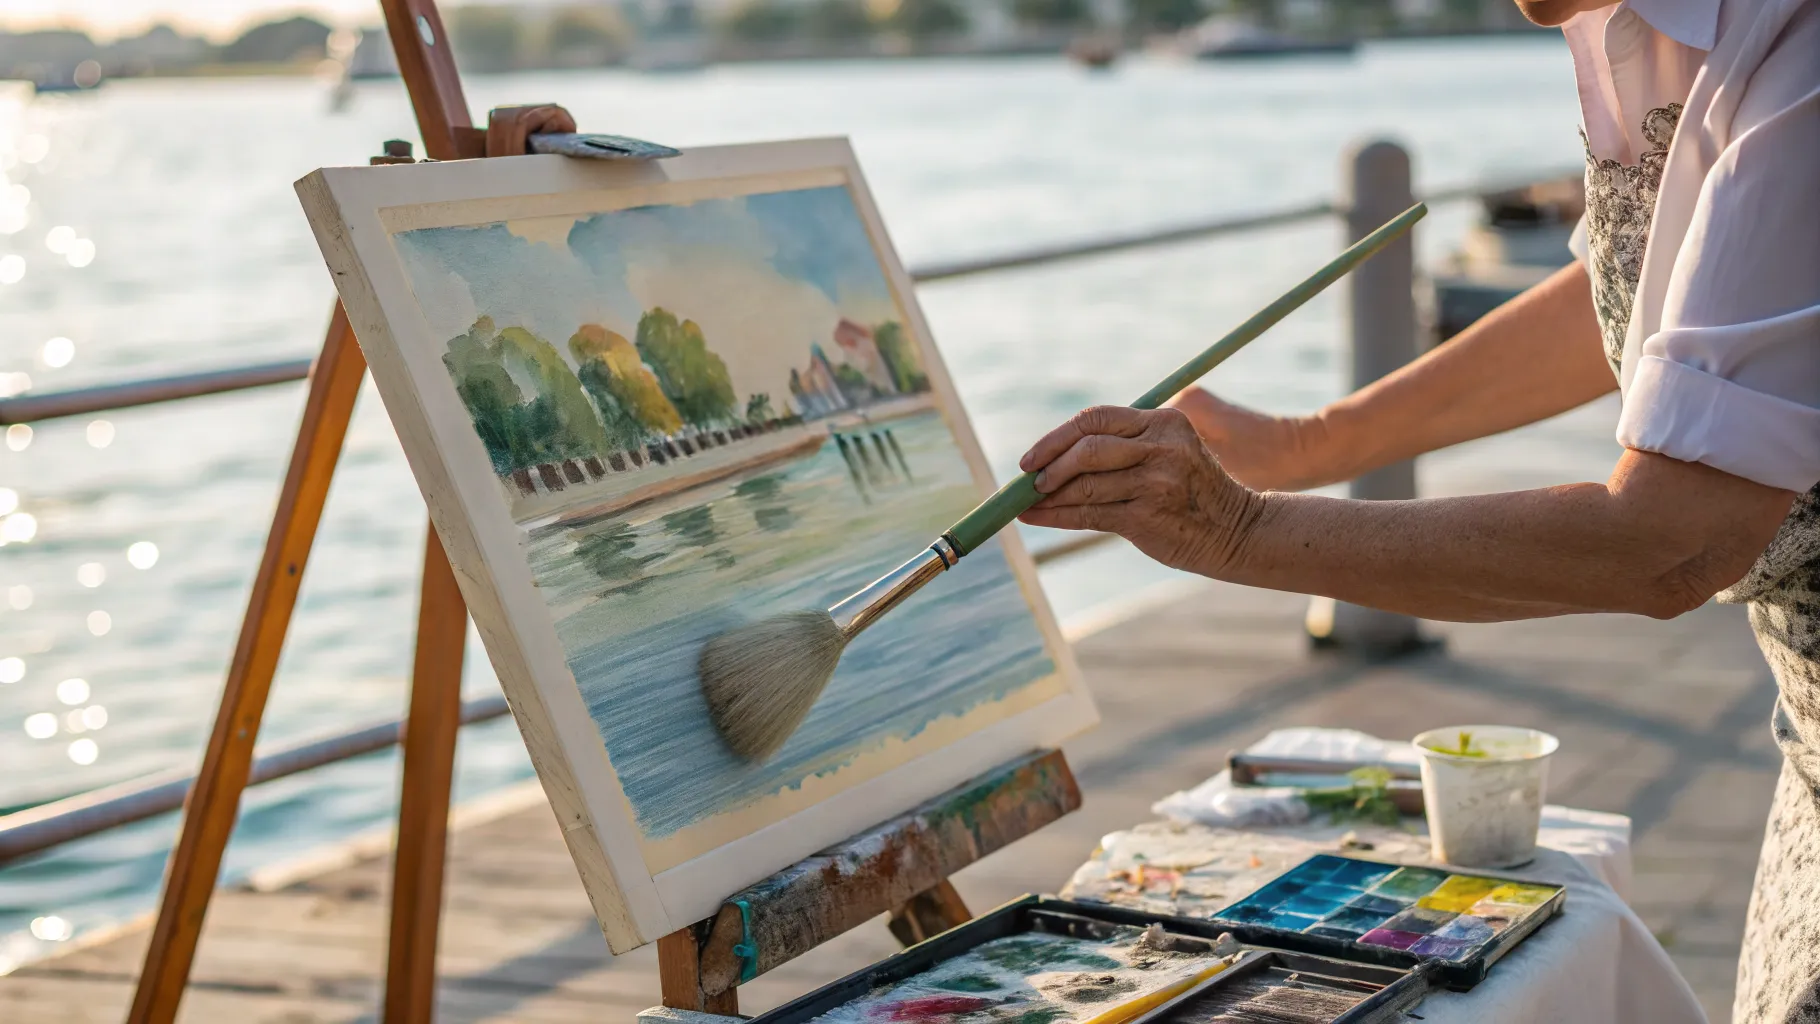
Executing a flawless hydration wash is a simple but precise process. First, gather your materials: a clean watercolor canvas panel, a large, soft brush (like a squirrel mop or a wide flat brush), and clean water. Position your canvas on a flat, waterproof surface or a slight incline, depending on the effect you desire. Dip your large brush into the clean water and apply a generous, even coat across the entire canvas surface. Look for a uniform sheen across the panel, with no dry spots or puddles. If you see pooling water, gently wick away the excess with a corner of your brush or a damp sponge. The goal is a damp, glistening surface, not a soaking wet one. This initial step is a core component of any effective watercolor canvas hydration washes training and sets the stage for beautiful, flowing applications of color.
Techniques for Fluid Pigment Blending and Layering
Once your canvas is properly hydrated, you can begin exploring the magic of wet-on-wet painting. This technique is especially beneficial for creating soft gradients, atmospheric skies, and dreamy backgrounds. An area where this truly shines is in fluid pigment blending layers older adults often find both therapeutic and artistically fulfilling due to its forgiving nature. With the canvas damp, load your brush with pigment and gently touch it to the surface. Watch as the color blooms and spreads organically. To blend two colors, apply them near each other and allow them to mingle, or use a clean, damp brush to gently guide them together. Successful layering requires an understanding translucent ink mixing balances; you must let each layer dry to a damp (not bone-dry) stage before adding the next to avoid creating muddy colors. Many successful wet on wet color wash art classes emphasize patience and timing as the keys to achieving depth and clarity in your layers.
Achieving Harmony: Understanding Translucent Ink Balances
Watercolor's beauty lies in its transparency. Unlike opaque media like acrylics or oils, watercolor layers interact with one another and the white of the canvas below. Mastering the understanding translucent ink mixing balances is crucial for creating luminous, vibrant paintings rather than dull, overworked ones. Think of it as mixing light, not just paint. When you layer a transparent yellow over a transparent blue, the light passes through both, and your eye perceives green. A key principle taught in watercolor canvas hydration washes training is to start with your lightest colors and gradually build up to your darkest tones. This preserves the brightness of the underlying layers. Planning your composition and color values in advance helps maintain this balance, ensuring that each subsequent wash enhances the overall piece without obscuring the delicate translucency that makes watercolor so captivating.
Common Mistakes to Avoid in Your Wash Practice
Even with guidance, beginners can encounter pitfalls. Here is some actionable advice to help you navigate the learning process, often covered in advanced wet on wet color wash art classes:
- Using Too Much or Too Little Water: Over-saturating the canvas leads to uncontrollable pigment bleeds and long drying times. Conversely, an insufficiently damp surface will cause streaks and hard edges. Strive for that consistent, satin sheen.
- Working the Paint Excessively: A common error is to over-brush a wash once it's applied. This can lift the underlying pigment and create a muddy appearance. Apply the color with confidence and then let it settle on its own.
- Ignoring Drying Times: Being impatient and applying a new wet layer onto a still-soggy previous layer is a recipe for disaster. This is especially important when focusing on fluid pigment blending layers older adults may be learning for the first time; patience is key to clean results.
- Using Dirty Water: Always have two containers of water: one for rinsing brushes and one for mixing with colors or re-wetting the canvas. Using dirty water will dull your pigments and compromise your color mixing.
Frequently Asked Questions
What is the main purpose of a hydration wash on a watercolor canvas panel?
The primary purpose is to create a damp, receptive surface that allows watercolor pigments to flow, blend, and settle evenly. Because gessoed canvas is less absorbent than paper, a hydration wash prevents streaking and hard edges, which is a foundational skill in any watercolor canvas hydration washes training.
How is this technique different from working on paper?
While both involve wetting the surface for wet-on-wet techniques, the canvas relies more on surface tension, whereas paper absorbs the water into its fibers. An informative guide to fine art paper absorption would explain that paper swells, while canvas gesso simply holds a film of water on top. This changes the paint behavior and drying time significantly.
Are there specific techniques for fluid pigment blending layers older adults would find easier?
Yes, the wet-on-wet technique facilitated by a hydration wash is very forgiving. Using larger, softer brushes and allowing the water to do most of the blending work reduces the need for complex wrist movements. Gravity can also be a tool; tilting the canvas to guide the color flow is an effective and low-strain method taught in many inclusive wet on wet color wash art classes.
How do I know if I have the right water balance?
The ideal surface should have a consistent, soft sheen without any visible puddles of standing water. If it's too wet, the color will spread uncontrollably. If it's too dry, you'll see streaks. It takes practice, but you will learn to recognize the perfect level of dampness for optimal control and blending.
References
- The Watercolorist's Essential Notebook: Surfaces & Preparations
- Modern Watercolor: A Guide to New Techniques and Materials
- The Chemistry of Pigments and Binders in Fine Art
- Art for All Ages: A Study in Adaptive Art Education
Authored by FreshLifeWire team